DIY 3 Tier Cupcake stand
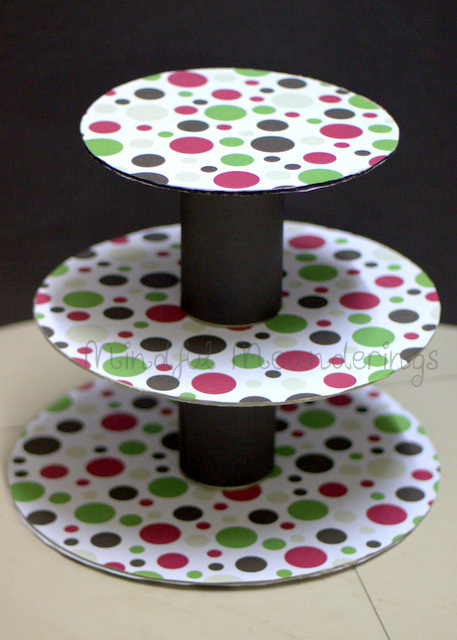
Made this DIY 3 Tier Cupcake stand today for Monika..
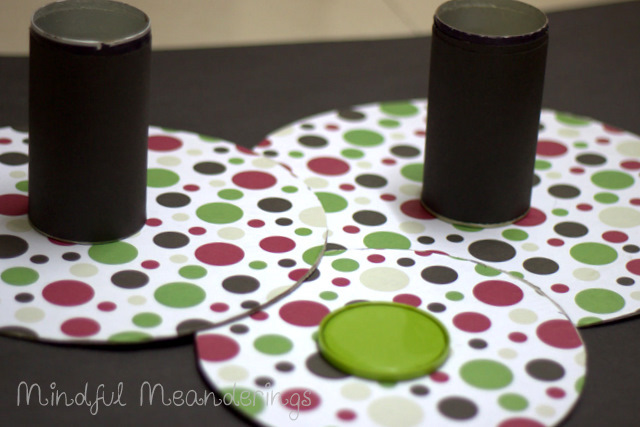
and lookie you can easily dismantle it too..
I love the polka dots..
What do you think??
I am still debating if I should add a white or cream lace trim..and if it needs legs at the bottom.. The layers are hard cardboard cut from a packaging box.. polka dot designs from the ItsyBitsy Store – 10Rs each for the pattern paper and for the layers, used (stickman/ pringles) chip containers bought from Indigo Airlines.. The caps come off and can be used to hide stuff inside .. hehe. Easy peasy Upcycled project.
Each layer was fixed with the other using kwik fix. I used household plates to trace out 3 circles . It was difficult t cut the cardboard so I used a heavy duty scissor & when that hurt.. used an exacto knife. That is really really sharp and you should be careful. The cardboard is from an old microwave box.
Another problem that I faced was that the cardboard was slightly bent, so i had to keep the circles under the bed overnight.





I think it is really looking nice… What did you use for the plates and the stand ? The fact that you can dismantle it makes it a killer DIY !
Awesome .. I think I will adapt this idea and recycle some CDs
I LOVE IT
thank u so much dear… and this in a matter of 2 days after sending u that email, u are my craft goddess 🙂
Lovely work there 🙂
This is simply superb !!! someday i’l surely make it to ad a zing to my cupcakes …..
this is an awesome idea. I love the polka dots.
Shruti, do a stand no? Is this for Mon for just showcasing her stuff or for delivering her order?
Some thing cup like thing upside down at the bottom. Instead of gluing, use a simple nut and bolt kind of screw, with a washer on either side. Then it will rotate.
@UTBT – she wanted one to display cupcakes at exhibitions and stalls. Something that’s easy to carry , is stable and won’t get blown away..
Without glue will make it unstable.. what if a customer pushes it. or if it blows too hard. Base had to be as stable as could be. I tried a thermocol one.. but it was too light. I don’t have a drilling machine at home.. will pick up a handy one this week and try something with plates. Lets see.
@Somu – cardboard & chips container with lids
@Dr Sonia – 🙂 awesome upcycling project.. do share pics
@Mon – Phew! We’ll try other options too 🙂
@pinksocks – thank you! 🙂 Not seen u here before.. Hi!
@smita: For home use, just use thin cardboard.. I struggled to cut the hardboard. Even the 6 inch super sharp blade gave away.
@magical homes.. thank you. I love the polka dots too 🙂 Welcome here
Very creative
Awesome Shruti. Loving it. Great recycling……
wao..nice idea..looking fab
Dora’s Unique Touch
http://chandradey.blogspot.in
This is such a fabulous idea! I’ll try it for sure! I’ve only ever used a small plate over a big one by keeping glass or candle holders one on top of the other! If u fill the glass with coloured stones or water, it looks fab too!
Thanks for this – now I’ve got something to do!
WOW! Absolutely love the polka dots 🙂