Winter art projects for kids are a wonderful way to explore icy colors, snowy textures, seasonal animals and dramatic winter skies—even if there is no snow where you live. This updated collection brings together 25 painting, drawing, collage, printmaking and mixed-media ideas for preschool, elementary classrooms, homeschool lessons and creative afternoons at home.
Choose a quick finger-painting activity for younger children, practice perspective with aerial-view snowmen, experiment with symmetry through snowflake art or create a display-worthy winter landscape. Every project below includes a suggested age range, estimated time, technique, materials and learning benefit, so you can find an activity that fits your group.
Winter looks different around the world. Some children experience snow and ice, while others have mild or rainy winters. Invite students to compare the art with their own environment rather than suggesting that every winter is white. For projects using splatter paint, salt, craft knives or hot glue, prepare the difficult steps in advance and supervise according to the children’s ages.
Easy Winter Art Projects for Preschool and Kindergarten
These projects use stamping, dabbing, simple shapes and sensory painting. Adults can prepare complicated outlines while children make the creative choices.
Paint a bold striped or patterned background, then assemble a cheerful penguin from simple paper shapes. Children can add hats, scarves, buttons and falling snow, so every penguin develops its own personality. This project combines painting and collage without requiring advanced drawing.
GradesK–2
Time45–60 min
TechniquePainting and collage
MaterialsPaint, colored paper, scissors, glue and scraps
Children draw a face from an unusual upward-looking viewpoint and surround it with painted or paper snowflakes. The open mouth and raised head make this a playful introduction to facial features and point of view. Younger students can begin with a prepared face shape.
Cut a snow-globe shape from cardboard and use a clothespin-held pom-pom to stamp soft circles of snow. Add a simple snowman, tree or house inside the globe. The repeated dabbing motion strengthens hand muscles and lets preschoolers create a finished scene with minimal frustration.
GradesPreK–2
Time25–35 min
TechniquePom-pom printing
MaterialsCardboard, pom-poms, clothespins and paint
Paint or draw a bare black tree on blue paper, then add white snow with fingertips or cotton swabs. Vary the size and spacing of the dots to show snow resting on branches and falling through the sky. Adults can prepare the tree silhouette for younger children.
This sensory project lets children spread, stamp and explore white paint before revealing a polar bear form. Focus on the experience of making texture rather than producing identical bears. Pair the activity with a simple discussion about how polar bears’ fur and body fat help them live in the Arctic.
GradesPreK–1
Time25–40 min
TechniqueProcess painting
MaterialsWashable paint, paper and texture tools
SkillsSensory exploration and cause and effect
Snowflake Art and Winter Painting Techniques
Use winter subjects to introduce resist painting, printmaking, symmetry, texture and color blending.
6. Salt-Texture Snowflake Painting
Draw a six-sided snowflake with white glue, sprinkle it generously with salt and shake away the excess. When dry, touch watery paint to the salt lines and watch the color travel. Place the artwork on a tray, use only a small amount of water and explain that real snowflakes have six-fold symmetry.
GradesK–4
Time30 min plus drying
TechniqueRaised salt painting
MaterialsCardstock, glue, salt and liquid watercolor
SkillsSymmetry and color movement
7. Watercolor and Oil-Pastel Resist Snowflake
Press firmly with a white oil pastel to draw a large radial snowflake, then brush blue and purple watercolor over the page. The waxy lines resist the paint and appear as the wash spreads. Encourage older children to repeat matching marks around all six arms for radial balance.
GradesK–5
Time30–40 min
TechniqueWatercolor resist
MaterialsWatercolor paper, white oil pastel and paint
Blend deep blue and black paint to create a winter night, then add stars and snow with white paint. A small tree or house silhouette gives the scene scale and contrast. This is a useful introduction to tints, shades and the difference between foreground and background.
Paint trees and a wintry shoreline on one half of a folded page, then press the paper together to make a mirrored reflection. Children will see how the transferred image changes as the paint spreads. Discuss horizontal symmetry and why reflections may appear softer than the objects above the water.
Drag small lines of paint across paper with a squeegee or sturdy card, then cut the dried color fields into triangular trees. Arrange the trees on a salt-textured snowy background. This technique creates dramatic blending without requiring precise brush control.
Grades1–6
Time45–60 min
TechniqueSqueegee painting and collage
MaterialsPaint, cardstock, squeegee, salt, scissors and glue
Create patterned mittens from torn or cut tissue paper and place them over an expressive painted background. Add yarn or a connecting line to guide the viewer’s eye through the composition. Although the linked tutorial is in German, its visual sequence clearly demonstrates the collage method.
GradesK–4
Time40–55 min
TechniqueTissue-paper collage
MaterialsTissue paper, glue, background paper and paint
SkillsPattern, layering and composition
Winter Landscapes, Trees and Cityscapes
These projects help elementary students explore depth, perspective, foreground, background, texture and atmospheric color.
12. Snowy Woods Watercolor Art
Mask several narrow tree trunks with painter’s tape, cover the page with blue watercolor and drop deeper color into the wet wash. Remove the tape when dry and add bark marks with a fine brush or toothpick. Make nearby trees wider and distant trees narrower to create depth.
Grades2–6
Time40–55 min
TechniqueTape-resist watercolor
MaterialsWatercolor paper, tape, paint and fine brush
Build pale aspen trunks against a cool background and add small birds for a bright focal point. Children can paint, draw or collage the birds, making this project easy to adapt across age groups. Compare the vertical tree lines with the rounded bird shapes.
Combine rectangles, squares, triangles and circles to create houses, roofs, windows and snowy trees. Invite children to arrange the pieces before gluing, then add cotton, buttons or drawn details. This is an especially useful art-and-math connection for kindergarten and early elementary students.
GradesK–3
Time35–50 min
TechniqueGeometric collage
MaterialsColored paper, scissors, glue and decorations
Paint papers in cool winter colors, cut them into buildings and layer the shapes across the page. Add windows, rooftops and falling snow after the city is assembled. Different building heights and overlapping edges help students understand rhythm and depth.
Grades2–6
Time50–60 min
TechniquePainted-paper collage
MaterialsPainted paper, scissors, glue and white paint
Cut trees and rolling ground from newspaper, then place the printed shapes over a painted background. Bubble wrap creates a field of snowy dots and adds another recycled texture. Ask students how printed words change the way the landscape feels.
Grades1–5
Time40–55 min
TechniqueRecycled collage and printing
MaterialsNewspaper, paint, bubble wrap, scissors and glue
Paint paper in several greens, cut triangular evergreens and layer them across a snowy ground. Larger, darker trees can sit in front while smaller, lighter trees recede into the distance. The link now points directly to the tutorial’s current canonical URL rather than its older redirecting address.
Grades2–6
Time45–60 min
TechniquePainted-paper collage
MaterialsPaint, paper, scissors and glue
SkillsColor value and atmospheric depth
18. Chalk-Pastel Northern Lights
Blend bands of green, turquoise, purple and pink chalk pastel across dark paper, moving the color upward in soft curves. Add a black tree line and white stars or snow. Show children a photograph of the aurora first and explain that the lights are caused by charged particles interacting with gases in Earth’s atmosphere.
Grades2–6
Time35–50 min
TechniqueChalk-pastel blending
MaterialsBlack paper, soft pastels and white paint
Instead of drawing a snowman from the front, imagine looking straight down from the sky. Overlapping circles, a foreshortened nose and objects around the figure make the unusual viewpoint clear. This is a memorable introduction to bird’s-eye perspective for elementary students.
Draw a bright red cardinal perched among dark branches, then wash the sky with pale blue and dot on snow. The warm bird becomes an immediate focal point against the cool background. The link has been corrected from the obsolete Blogspot India address to the direct canonical post.
GradesK–5
Time35–50 min
TechniqueDrawing and watercolor
MaterialsPaper, black marker, watercolor and white paint
SkillsWarm-cool contrast and observation
Winter Art Projects from ArtsyCraftsyMom
These projects keep readers on ArtsyCraftsyMom and include complete instructions using familiar classroom and household supplies.
Stamp black penguin bodies with a halved potato, add smaller white belly prints and complete the birds with orange beaks and feet. A paper-plate igloo, cotton and painted snow turn the prints into an Antarctic scene. This is a cheerful introduction to block printing for younger artists.
GradesPreK–3
Time35–50 min
TechniqueVegetable printing and collage
MaterialsPotato, paint, paper plate, cotton and glue
Begin with a light blue watercolor wash, layer green papers for rolling hills and add trees, a house and snow. A toothbrush or cotton swab creates falling snow, while okra printing can add decorative snowflake marks. Children can personalize the scene with smoke, windows, animals or a snowman.
GradesK–5
Time40–55 min
TechniqueWatercolor, collage and printing
MaterialsPaper, watercolor, foam or cardstock, paint and glue
Layer curved white cardstock with narrow cardboard spacers to create snowy depth, then place trees and houses at different levels. The project introduces foreground, middle ground and background in a very concrete way. Adults should handle any craft-knife cutting needed for the frame.
Grades3–6
Time60–90 min
TechniqueLayered paper construction
MaterialsCardstock, cardboard spacers, scissors, glue and pencil
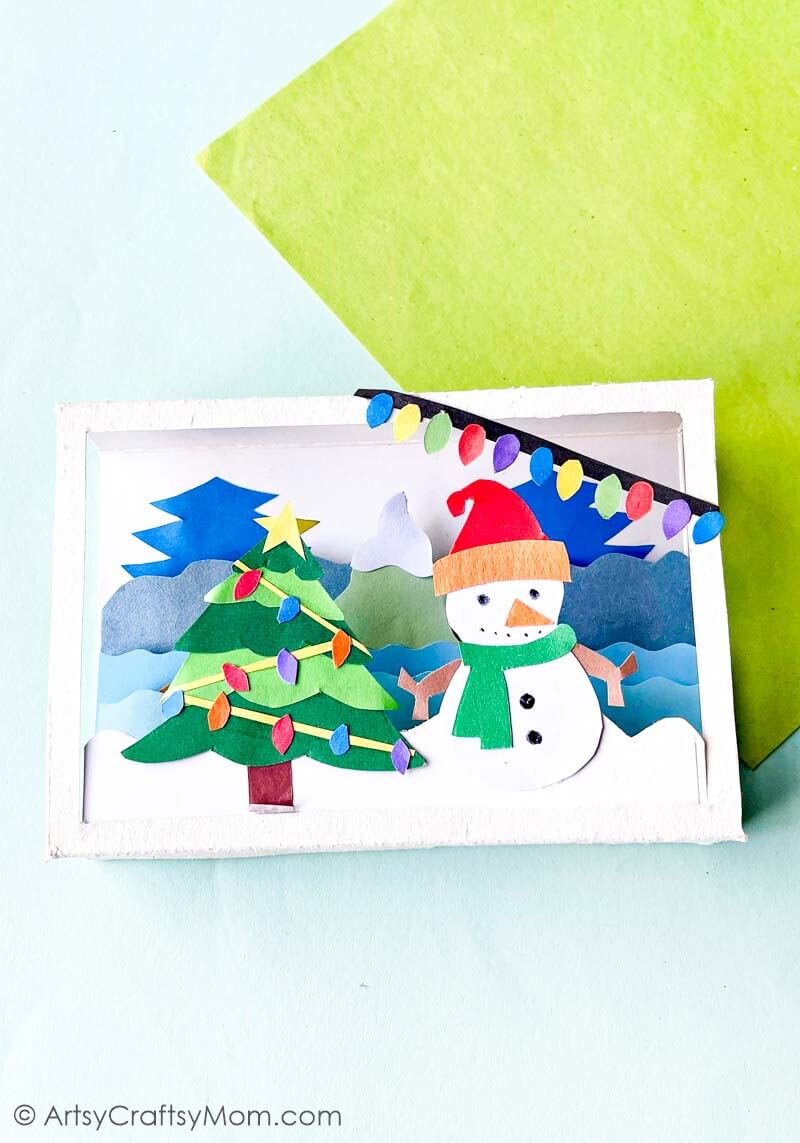
Turn a cereal box into a colorful dimensional scene by layering snowy hills, trees, a paper snowman and string lights. Cardboard spacers lift the layers away from the background and create visible depth. This newer internal tutorial works well as a multi-session classroom or homeschool project.
Grades2–6
Time60–90 min
Technique3D paper collage
MaterialsCereal box, colored paper, ruler, scissors and glue
Use round sponge pouncers to repeat painted reindeer faces across white or brown paper, then draw antlers and add red noses. The finished artwork can become wrapping paper, a large classroom mural or a lesson in repeating pattern. To keep the page broadly winter-focused, use this as the optional holiday project.
GradesPreK–5
Time25–40 min
TechniqueSponge printing
MaterialsPaper, round sponge brushes, paint and marker
SkillsPattern, repetition and printmaking
How to Choose the Right Winter Art Project
If you need…
Choose…
Why it works
A 30-minute preschool activity
Winter tree finger painting or pom-pom snow globe
Simple repeated movements and minimal cutting
A low-mess project
Mitten collage or aerial-view snowmen
Mostly paper, crayons and glue
A process-art invitation
Polar bear art or salt snowflakes
Children explore materials and cause and effect
An art-and-math lesson
Winter village, snowflake resist or reflections
Connects shapes and symmetry with visual art
A display-worthy elementary project
Winter cityscape, Northern Lights or cardinal painting
Strong contrast and clear focal points
A multi-session challenge
3D winter shadow box or snowman scene
Builds planning, measurement and paper-engineering skills
Tips for Teaching Winter Art
Offer a limited palette: Blue, turquoise, purple, white and black make a cohesive winter base. Add one warm accent, such as red or orange, for contrast.
Demonstrate the technique, not a result to copy: Show how to blend, stamp or layer, then let children make their own decisions.
Prepare by age: Pre-cut complex shapes for preschoolers, while older students can measure, sketch and cut independently.
Build useful vocabulary: Use words such as texture, resist, symmetry, perspective, foreground, background, value and contrast.
Display the learning: Add a short artist statement explaining the technique or winter idea explored.
Low-Prep Winter Art for Preschoolers
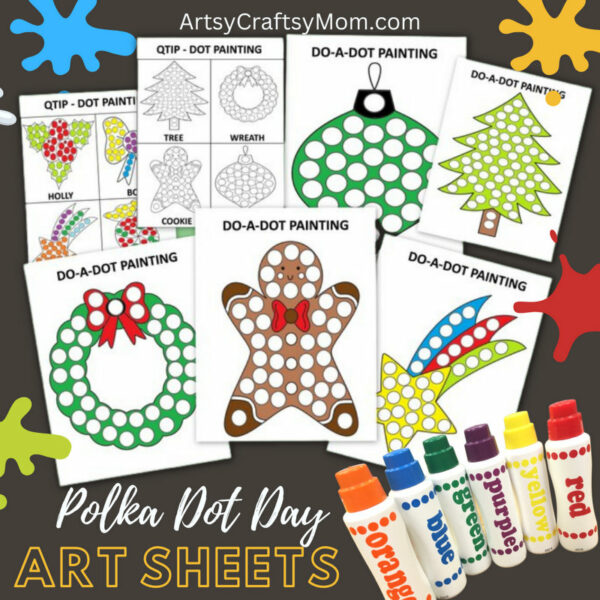
The Winter Dot Painting Coloring Pages include small-dot designs for cotton swabs and larger designs for dot markers. They are an easy option for art centers, morning work, homeschool practice or days when preparation time is limited.
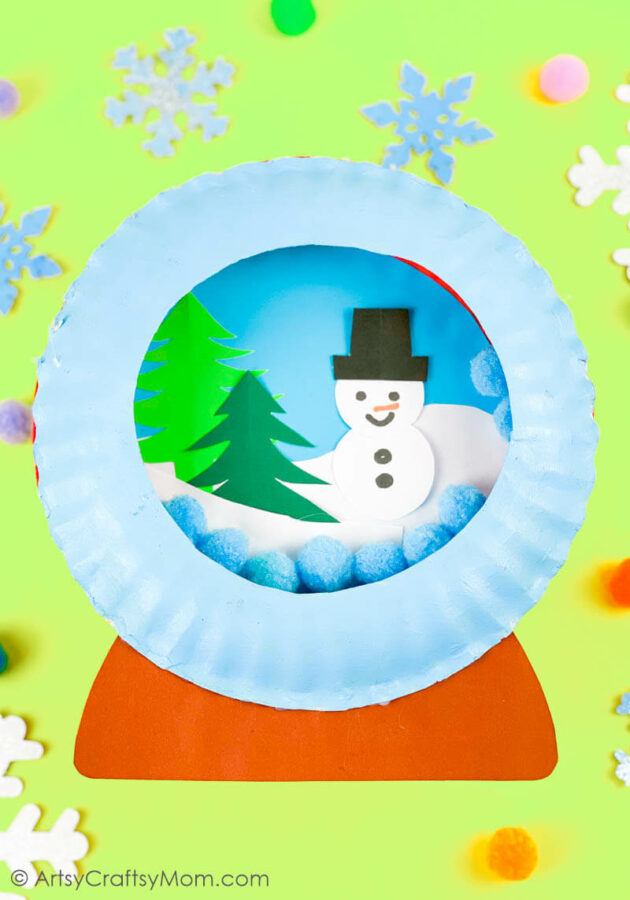
Create an unbreakable snow globe with a layered paper scene—an especially useful classroom alternative to glass jars.
Winter Art Projects for Kids: Frequently Asked Questions
What is the easiest winter art project for preschoolers?
Winter tree finger painting is the easiest place to start. An adult can prepare the tree silhouette, and children add snow with fingertips, cotton swabs or round sponge brushes.
Which winter art projects work well for elementary students?
Winter reflections, aerial-view snowmen, Northern Lights pastels, newspaper landscapes and winter cityscapes introduce stronger art concepts while remaining achievable for elementary students.
How can winter art be connected with other subjects?
Explore symmetry through snowflakes, perspective through aerial snowmen, geometry through winter villages, science through the aurora and animal adaptations through penguin or polar-bear art.
What can children make if they do not experience snow?
Children can still study snowy environments through photographs, books and art while also creating a picture of winter where they live. Compare local colors, clothing, plants and weather with the snowy scenes in this collection.
What supplies are most useful for a winter art unit?
Keep blue and white paint, watercolor paper, colored cardstock, black markers, oil pastels, glue, scissors, cotton swabs, sponges and recycled newspaper available. Most projects on this page can be completed from that basic collection.
Make Winter a Season for Creative Exploration
The best winter art projects give children room to experiment while teaching one clear idea. Start with a technique that suits your age group, show children how it works and then let them make artistic choices. Whether they create a tiny snowflake, a dramatic winter sky or a layered village, the finished art will reflect both the season and the young artist who made it.